Laying and Ballasting Z-scale Track
 In real life, railroad ties do not simply lay on a field of grass, or on plastic roadbed.
Ballast is used to help keep railroad ties from moving over time, as well as to provide sufficient drainage, all in an effort to ensure a resilient and sturdy roadbed that will last for years.
In real life, railroad ties do not simply lay on a field of grass, or on plastic roadbed.
Ballast is used to help keep railroad ties from moving over time, as well as to provide sufficient drainage, all in an effort to ensure a resilient and sturdy roadbed that will last for years.
Thankfully, Z-scale track does not come with metal or plastic pre-formed plastic roadbed, as I find these aesthetically unappealing (although they would make for sturdier afternoon livingroom-floor layouts). To get that prototypical look on a model railroad layout, you'll need to ballast your track.
Ballasting track is a point of no return, as it makes disassembly or modification of track difficult, to say the least. So, this is a step you'll want to postpone until your layout is exactly how you want it. And although I find it easier to ballast the track before adding scenery to the surroundings (you'll need some elbow room), you may prefer to ballast last so that the stones are the top layer (which will look more prototypical).
The following procedure is what I'm using on my in-progress layout, mostly because I like the results. There are, of course, many different ways to ballast track (including not doing it at all), so I present this as only one of many possible solutions. The most important thing is that you use the procedure that you find the most appealing and prototypically accurate.
Lastly, as a subtle warning, ballasting your track involves placing many small objects in places where they can interfere with the operation of the trains if not properly cleaned up. This means that it will take a bit of time to restore your track to good working condition, but being involved with Z-scale, you're probably already used to that. See Cleaning Z-Scale Track for more information.
See Converting Turnouts to Under-table Drive for information on removing track once it has been ballasted, a process that's not as difficult as it may seem.
See also John Cubbin's excellent Add Ballast And Weathering To MTL Micro-Track for pictures and instructions using Micro-Trains sectional track.
Feel free to write me if you have any additions or corrections to this page.
Click on any photo to see more detail.
 Here's what track looks like on a typical 2' x 4' Marklin oval layout.
My Grandfather had a standard two-loop setup with a siding and a small yard - essentially what you get if you combine all the track starter kits and use the track plan suggested in the Marklin catalog.
Here's what track looks like on a typical 2' x 4' Marklin oval layout.
My Grandfather had a standard two-loop setup with a siding and a small yard - essentially what you get if you combine all the track starter kits and use the track plan suggested in the Marklin catalog.
I prefer something a little more interesting, realistic, and permanent.
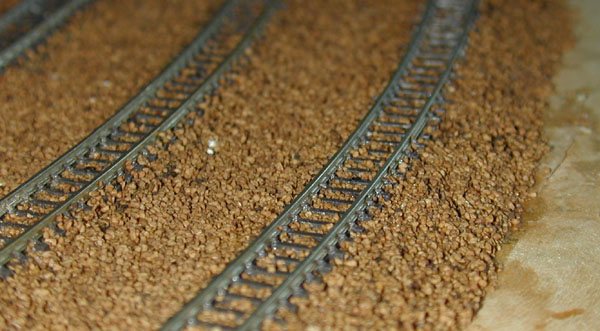
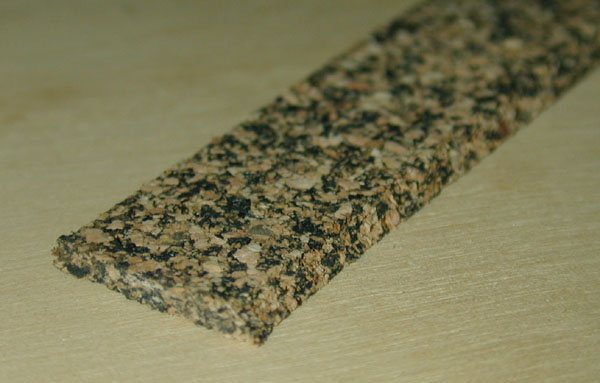 I started with Z-scale cork roadbed by Itty Bitty Lines.
They have a bunch of different shapes, including pieces to fit standard and curved turnouts - the most useful, by far, is the 1005 single-track bed.
It's flexible, and can be used with standard Marklin track pieces in a yard, or with flex track though a mountain pass.
I started with Z-scale cork roadbed by Itty Bitty Lines.
They have a bunch of different shapes, including pieces to fit standard and curved turnouts - the most useful, by far, is the 1005 single-track bed.
It's flexible, and can be used with standard Marklin track pieces in a yard, or with flex track though a mountain pass.
It raises the track a good height above the baseboard, and is also is a sound insulator (facilitating quieter running trains).
Start by marking the position of the track you've already placed on the baseboard with a pencil. You can put a mark every 1-2 inches between the ties, or simply outline the track - whatever's easiest for you.
I use hot-melt glue to fasten the roadbed to the baseboard, following the lines I've drawn; it dries in seconds, requires no mixing, comes up easily if you make a mistake, doesn't need pins to hold the cork in place, and is nice and strong.
Hot-melt glue guns and glue are available at any hardware store, usually under $15.00.
Don't use too much, or the roadbed will be uneven and won't sit flat on the baseboard.
Glue only a 2-4 inches at a time, and routinely eyeball your work from a low perspective to make sure the roadbed is straight and even.
Use a paint scraper to pull any roadbed up as needed, being careful not to tear the cork.
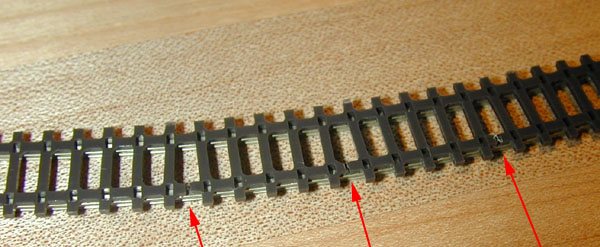
 Using the Marklin 8999 track nails, fasten your track to the cork.
Each piece of Marklin track (except for the turnouts) has pre-marked holes, although they can be difficult to see (which is good); holes are usually placed 2-3 inches apart.
Using a pair of tweezers or needlenose pliers, hold the nail above the holes, and pound them in with a small hammer.
Most likely, your hammer will be wider than the rails, and won't be able to pound the nails all the way down; you can use a closed pair of needlenose pliers to finish the job.
The nail head should be resting on the tie, but the tie should not be bent down at all; if it is, you went too far.
Using the Marklin 8999 track nails, fasten your track to the cork.
Each piece of Marklin track (except for the turnouts) has pre-marked holes, although they can be difficult to see (which is good); holes are usually placed 2-3 inches apart.
Using a pair of tweezers or needlenose pliers, hold the nail above the holes, and pound them in with a small hammer.
Most likely, your hammer will be wider than the rails, and won't be able to pound the nails all the way down; you can use a closed pair of needlenose pliers to finish the job.
The nail head should be resting on the tie, but the tie should not be bent down at all; if it is, you went too far.
The Marklin nails are just long enough to pass through the cork and penetrate the baseboard just a little. You won't need to put a nail in every hole. In fact, if you use your nails sparsely, you'll leave more flexibility in the track, which can be used to straighten it out (if necessary). Once it's perfectly straight (eyeball it from a low perspective), add more nails.
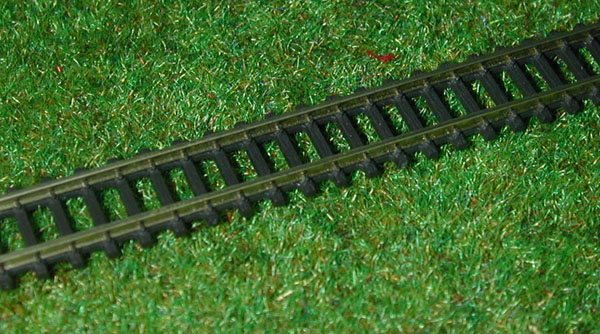
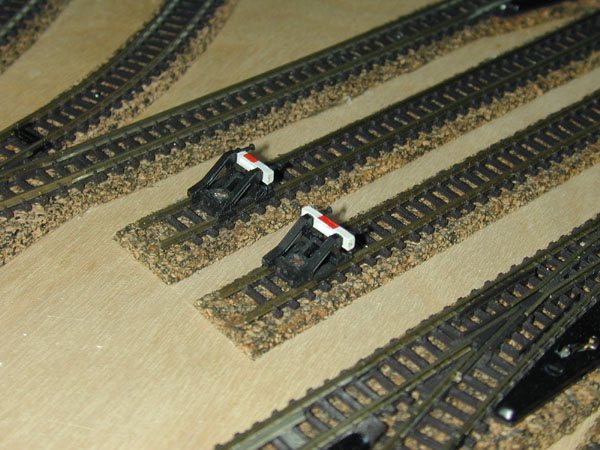
The photo shows some different kinds of track placed on the cork.
If you're not comfortable doing the real ballasting, or just not ready, you can just leave it in this state.
It's a good compromise, and looks pretty good in my opinion.
|
A Word About Flex-Track While the standard short pieces of Marklin track are convenient for train yards and very small layouts, Marklin flex track (8594) is ideal for long straight-aways and large, sweeping curves (like these), as well as S-curves or other interesting shapes. Flex track is also less expensive than standard track pieces when covering the same ground (about half the price). Flex-track comes in 26-inch (660 mm) long sections, which can be bent or cut to just about any practical shape - you won't have to limit yourself to the three standard track radii anymore!
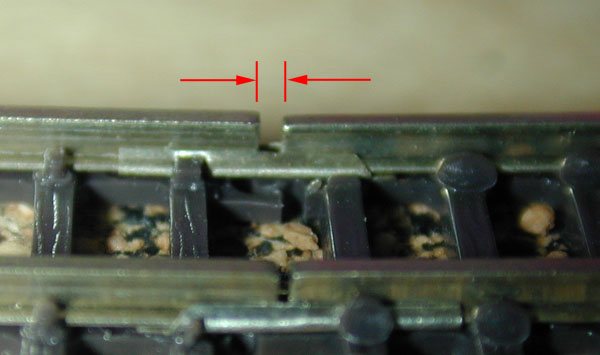
When the track is laid in a curve, one rail will inevitably be longer than the other. Using rail nippers or a good pair of flush-cut pliers, cut the excess rail. If necessary, clean it up carefully with a rotary tool and a fiberglass cutting disk (Dremel #426) at low speed. On sharp curves, you may have to remove a few ties as well. Add a rail joiner (Marklin 8954), if necessary. |
 Run your trains around and around, and make sure everything is nice and even.
It's best to find and correct problems before you add the ballast.
If you're using flex-track (such as Marklin 8594), routinely check for gaps in the rails, and use a strong pair of pliers (preferably without teeth) to slide the rails together as needed.
Run your trains around and around, and make sure everything is nice and even.
It's best to find and correct problems before you add the ballast.
If you're using flex-track (such as Marklin 8594), routinely check for gaps in the rails, and use a strong pair of pliers (preferably without teeth) to slide the rails together as needed.
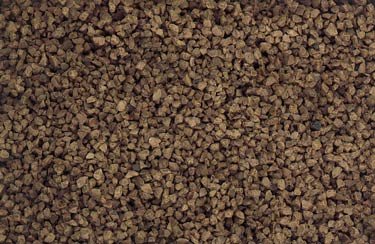 The ballast I used was Woodland Scenics "Brown" ballast.
You can get Fine (#B72) or Medium (#B79) ballast, whatever suits your taste.
The fine ballast, in my opinion, looks the best, and is more prototypically accurate (2.2-7.3 scale inches, according to Woodland Scenics), although some may still find it too coarse.
In some places, I actually prefer the appearance of the medium ballast (7.3-11 scale inches), even though I know it's too coarse to be realistic, mostly because I appreciate the texture.
If you want finer ballast, a little grinding and sifting may afford you the consistency you want.
The ballast I used was Woodland Scenics "Brown" ballast.
You can get Fine (#B72) or Medium (#B79) ballast, whatever suits your taste.
The fine ballast, in my opinion, looks the best, and is more prototypically accurate (2.2-7.3 scale inches, according to Woodland Scenics), although some may still find it too coarse.
In some places, I actually prefer the appearance of the medium ballast (7.3-11 scale inches), even though I know it's too coarse to be realistic, mostly because I appreciate the texture.
If you want finer ballast, a little grinding and sifting may afford you the consistency you want.
The reason I chose Brown, other than the fact that I liked the way it looked, is that it almost exactly matches the cork roadbed. (Starting to make sense now?)
This is especially useful around turnouts and other places you may not want to fully ballast, as the cork will still peek through.
If you're modelling a North American layout, you'll probably want Light Gray or Gray.
The most important thing is that you like the way it looks.
 The next step is to apply the ballast.
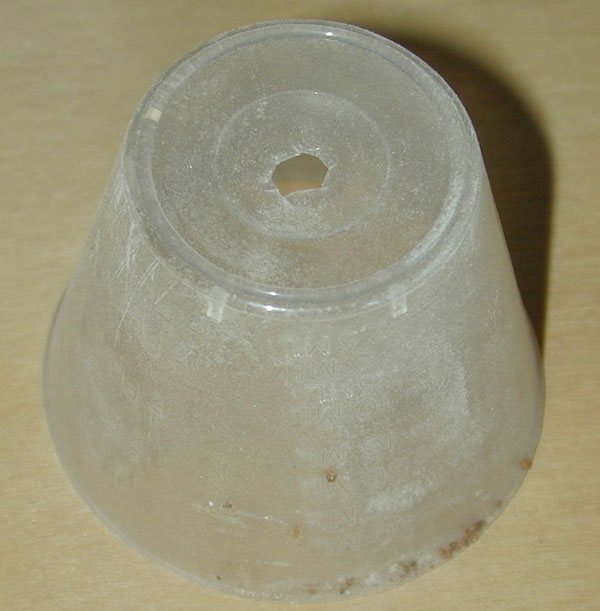
HO and N-scale modelers have the luxury of ballast spreaders, but I'm not aware of one for Z-scale, so I made my own.
It took all of ten seconds; I just cut a small hole (3/16") in the bottom of a little plastic mixing cup.
The next step is to apply the ballast.
HO and N-scale modelers have the luxury of ballast spreaders, but I'm not aware of one for Z-scale, so I made my own.
It took all of ten seconds; I just cut a small hole (3/16") in the bottom of a little plastic mixing cup.
 Woodland scenics provides two ways of adhering the ballast. The first is to lay it down and then spray it with their Scenic Cement (#S191).
In my experience, this really doesn't work. Even if you saturate the ballast, it takes two days to dry, and then just crumbles if you touch it.
Woodland scenics provides two ways of adhering the ballast. The first is to lay it down and then spray it with their Scenic Cement (#S191).
In my experience, this really doesn't work. Even if you saturate the ballast, it takes two days to dry, and then just crumbles if you touch it.
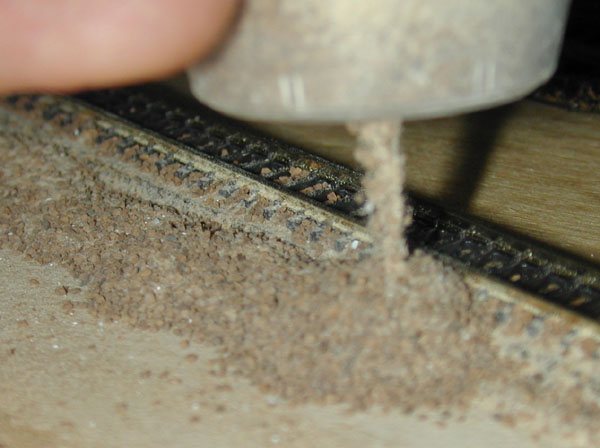
I whole-heartedly prefer the second method, which involves dry-mixing two parts ballast with one part Ballast Cement (#B91); essentially, involving one bag of each. While this increases the cost (Ballast Cement is roughly as expensive as Ballast, so using it ends up doubling the price), a single $3.00 bag of ballast goes a long, long way in Z-scale. Shake them together in a plastic container (I really like the new "GladWare" clear plastic containers), and then scoop some up with the spreader/cup. Using a finger as a shut-off valve, move the cup along the sides of the track, letting ballast fall. This is not an exact science, so it's ok to color outside the lines.
Using a brush and a little stick, manipulate the ballast so that it falls between the ties, both outside and between the rails.
(If you're using brown ballast, and you don't want to put ballast between the rails, you don't have to; the cork will look just fine peeking through.)
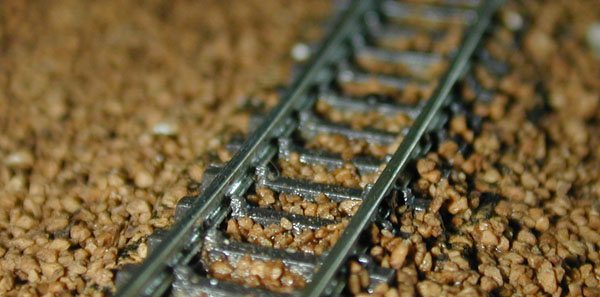
The ballast should not be any higher than the tops of the ties, and the drop-off to the baseboard should be mild (as opposed to a steep climb).
The photo at step 10 shows what it should look like.
Include a little more ballast than you think you'll need along the edges, as the edges can be covered with grass, bushes, or other scenery.
To avoid problems around turnouts, I suggest laying down pieces of high-quality masking tape over sensitive areas before dropping the ballast. I usually then trim the tape by scaping an X-acto knife along the outsides of the rails, allowing the ballast to fall on the safe areas (outsides, mostly) of the turnouts.
For greater control in these areas, you may want to moisten the ballast mixture first, and then apply it with a stick or small spoon.
It's best not to get any ballast between the rails of turnouts and function track, especially between the points.
Also, make sure to keep it out of the solenoid mechanisms; you'll want to be able to remove the solenoid covers even after the ballast has dried.
 When the ballast looks like you want it to, spray it with "wet water" (a pint of water and a teaspoon of dish detergent).
The finer the spray from your spray bottle, the better; stronger sprays will displace the ballast while you're spraying.
If you can get ahold of a mister (available at any nursery for a few bucks), so much the better.
When the ballast looks like you want it to, spray it with "wet water" (a pint of water and a teaspoon of dish detergent).
The finer the spray from your spray bottle, the better; stronger sprays will displace the ballast while you're spraying.
If you can get ahold of a mister (available at any nursery for a few bucks), so much the better.
Spray enough so that the ballast is completely saturated. The water activates the Ballast Cement; if it doesn't get wet, it will just remain powder. It will take 8-10 hours to dry (I wish Woodland Scenics would print the expected dry time of their adhesives on the packages).
While it's drying, you can "massage" the ballast with a stick (preferably of metal), but be careful, as wet ballast tends to clump.
Be patient waiting for it to dry, as the "is it dry yet" test is always performed too soon, and always yields an unfortunate answer.
When it is dry, it should be hard to the touch; a little rubbing will loosen a few stones.
Motivated scraping will remove more material.
If the dried ballast appears to have translucent, excessively-hard areas, it means the ballast cement has clumped and then dried. This can happen if the ballast and cement aren't suffiently mixed or if the mixture settles after being spread on your track, but before being sprayed (usually caused by an attempt to move the mixture around).
If you see any small holes that look like craters, it means the water beaded when it was being sprayed - this can be avoided by adding dish detergent to the water, a finer spray bottle, and better saturation of the ballast (all described above).
Next, use a track cleaning stone to remove any residue from the glue from the tops of the rails.
Lastly, using an awl, a sharp knife, or other pointed scraper, remove any pieces of ballast that may get in the way of the rolling stock. Naturally, anything protruding above the tops of the rails should be removed completely. Examine the track carefully, and make sure to scrape off any bits adhered to the insides of the rails (you'll feel like a dentist removing plaque).
When you're done, it's time to try running a locomotive over the newly ballasted track. I don't have to tell you not to use your most valuable and prized handmade brass engine right away; test it with an 8805 or something else you may not care so much about. After all the cleaning is done, you're ready to roll.
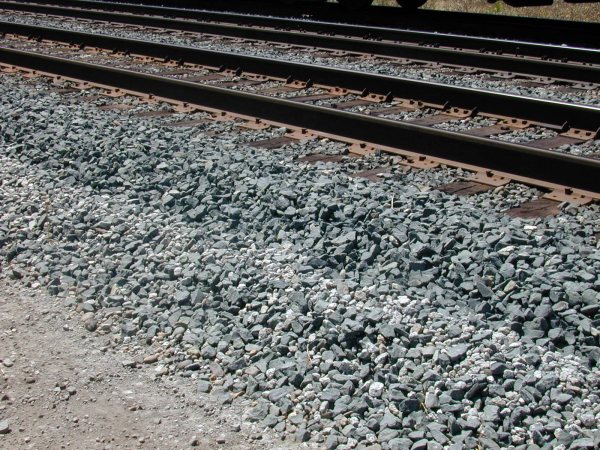 Here's a reference photo to show how ballast looks on some local railroad tracks (Bay Area, California).
Gray, brown, and tan ballast are all used in different places around the world.
Here's a reference photo to show how ballast looks on some local railroad tracks (Bay Area, California).
Gray, brown, and tan ballast are all used in different places around the world.
Feel free to write me if you have any additions or corrections to this page.
Return Home | Search | Contact Me
Copyright © 2000-2010 D. A. Karp. All rights reserved.